Firmware User Guide
Welcome to the firmware user guide. Before diving into setup instructions, it’s important to understand the purpose of this firmware.This firmware is designed to control a Pressure Rig that delivers a specified pressure (in PSI) to an actuator. It allows us to programmatically control our hardware.
Pico Set-Up
The microcontroller we use is the Raspberry Pi Pico. If you’ve never used the pico before here are some great starting resources and tutorials.
Github Set-Up
Now that you’ve set up the Raspberry Pi Pico SDK on your machine and have verified that it’s working, you’re ready to install and build the firmware we’ve developed.
Step 1: Clone the repository
git clone git@github.com:CooperUnionBIRDLab/Single_Regulator_Firmware.git
Step 2: Understanding the repo
You should see the following directory structure
pressure_rig_firmware/
├── CMakeLists.txt
├── README.md
└── pressure_rig_16.cpp
Here is a breakdown of each file
CMakeLists.txt: Defines the project, its dependencies, and how it should be built using CMake.
pressure_rig_16.cpp: Contains the core firmware code that runs on the Raspberry Pi Pico and interfaces directly with the Pressure Rig hardware.
VS Code Extension Instructions
In VsCode install the Raspberry Pi Pico Extension

Click on the extension and press Import Project
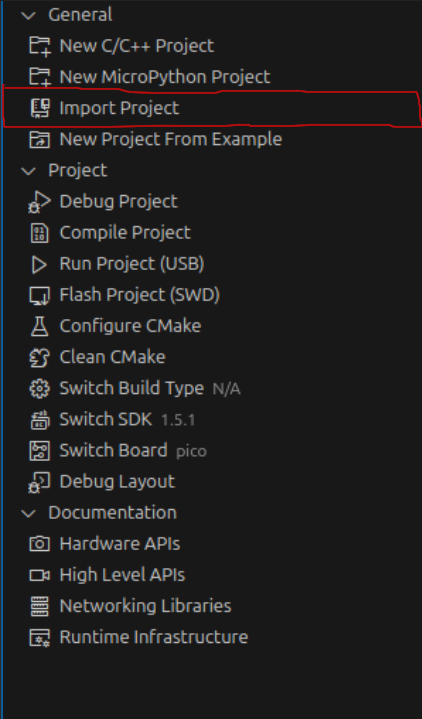
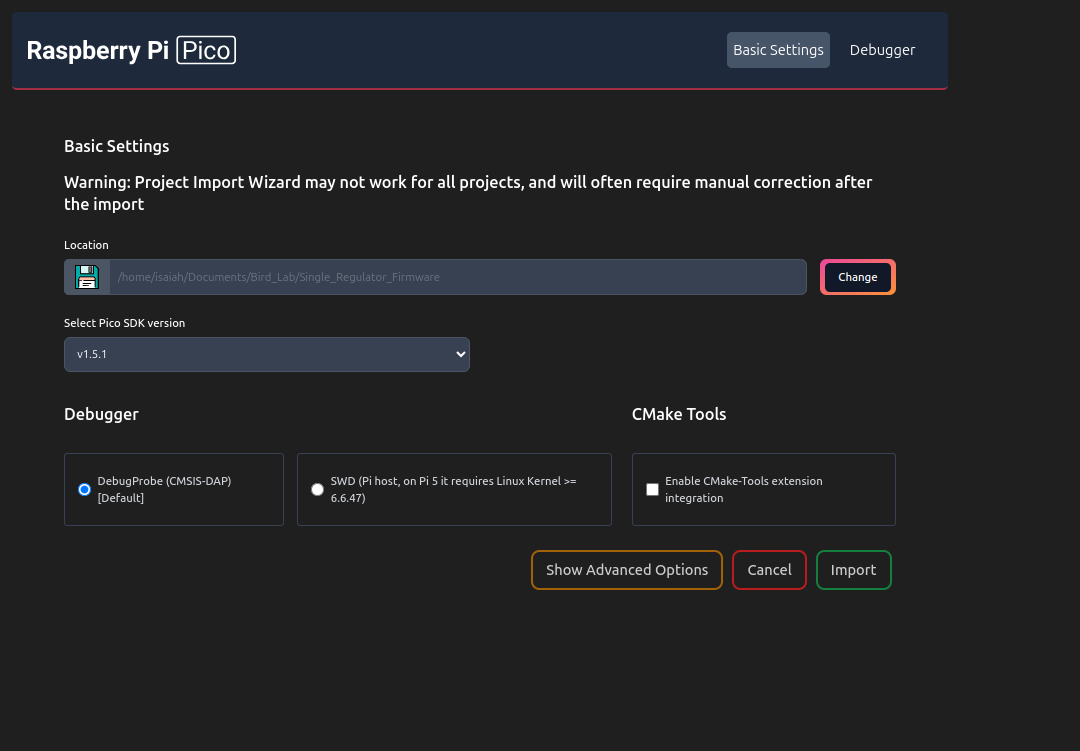
Locate the repostory we cloned earlier and set the Pico SDK Version to v1.5.1
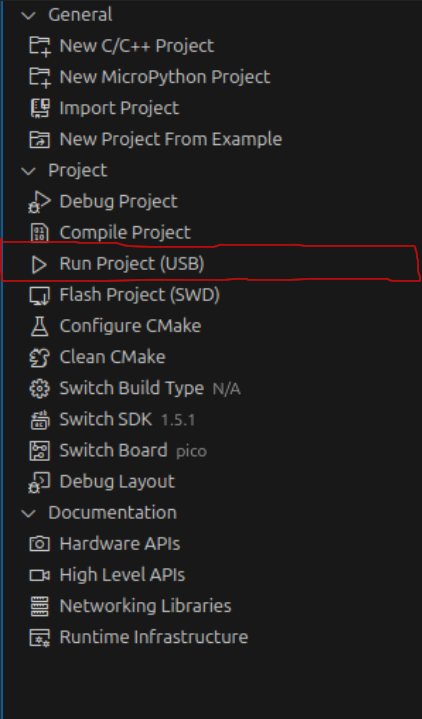
Then once everything is loaded go back and press Run Project
Command Line Instructions
Once you have cloned the repository and explored the project structure, follow the steps below to build and install the firmware.
Create the build folder
Inside the root directory of the project, run:
mkdir -p build && cd build
Generate build files with CMake
Inside the build/ directory, run:
cmake ..Compile the firmware
If the CMake step succeeds, build the project with:
make
Flash the firmware to the Pico
After compiling, put your Raspberry Pi Pico into boot mode. Then either:
Drag and drop the newly generated .uf2 file onto the Pico’s USB drive.
Or use the following command (replace [command goes here] with the actual command):
[command goes here]
Finish installation
Once the .uf2 file is copied, disconnect the Pico from the computer. The firmware should now be running.